How to keep your MacBook's battery healthy while working from home
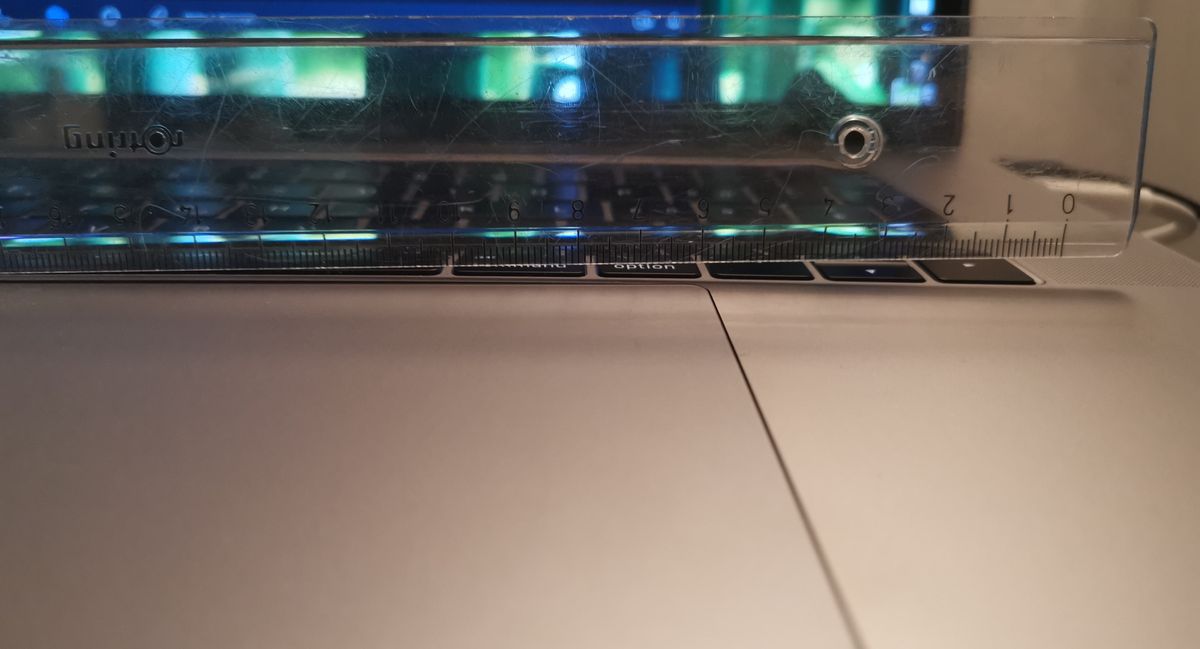
Since the beginning of the corona pandemic, I work from home. This means my MacBook is constantly connected to the charger. For Lithium-Ion batteries, it's not healthy to remain charged at 100% all the time. I first noticed that there's a problem when my trackpad wasn't clicking properly anymore. Upon inspection with a ruler, I noticed that the keyboard was curved because the battery had swollen. To replace the swollen battery, the entire Topcase had to be replaced.
To avoid this from happening again, I started looking for a way to control the charging behavior of my MacBook.
In Mac OS Catalina 10.15.5, Apple has introduced a new feature called Battery Health. It is found under System Preferences > Energy Saver. Apple describes the feature as:
The battery health management feature in macOS 10.15.5 is designed to improve your battery's lifespan by reducing the rate at which it chemically ages. The feature does this by monitoring your battery's temperature history and its charging patterns.
Based on the measurements that it collects, battery health management may reduce your battery's maximum charge when in this mode. This happens as needed to ensure that your battery charges to a level that's optimized for your usage-reducing wear on the battery, and slowing its chemical aging.
But what does that mean exactly? The description in the System Preferences is a bit clearer:

According to this message, OS X will start reducing the maximum charge of the battery when it ages, to extend its lifespan. In my tests, it drained the battery a bit after being plugged in for a while and then recharged it back to 100%. Since my battery health is still high, it didn't reduce the maximum charge even after being plugged in for multiple days.
This wasn't what I was looking for. I wanted to control the maximum charge level myself before the battery was degraded. Lenovo and Tesla are both offering such a feature out of the box, Apple doesn't. Luckily there's a free tool that allows you to take control over the maximum charge level.
AlDente gives you the possibility to set a maximum charge level for your MacBook. The tool itself writes this value to the SMC of your MacBook. Most likely it's just using the same feature OS X is using, just more explicitly.

How to install AlDente
Head over to AlDente's Github Page and download the latest release. Then unzip the archive and move AlDente.app to your Applications folder.
Upon opening, you'll probably get a message like AlDente cannot be opened because the developer cannot be verified. To work around this, right-click on the application and click Open:

When you start AlDente for the first time, it will ask you to install its helper tool. This is required for AlDente to be able to write the SMC value as root.
Once the app is running, set the value to the maximum you desire. I would recommend a value between 60 and 80 percent - I chose 70 percent as my sweet spot.
After that, you need to reboot to ensure the value is taken into account. If your battery is currently above your threshold, you'll have to unplug your MacBook, drain it below the threshold and then plug it back in. Once your defined maximum is reached, it will stop charging and display Not Charging.

You can also validate this in the System Profiler:

Compatible MacBooks
This should work on every Intel MacBook running Catalina or higher. It is currently NOT supported on ARM-based MacBooks. I have successfully tested it on a 2018 MacBook Pro 15" and a 2019 MacBook Pro 16". Based on information from the Github page, the following hardware is also confirmed working:
- 2020 MacBook Pro 13" with 4 TB3 ports
- 2019 MacBook Pro 16"
- 2017 MacBook Pro 13" without TouchBar
- 2017 MacBook Air 13"
- 2013 MacBook Pro 13"
Uninstalling AlDente
To uninstall AlDente, do the following:
- Set the maximum battery charge to 100%
- Exit the application
- Move the app to the trash
- Remove the helper tool with the commands below
- Reboot your MacBook
To remove the helper tool, run the following commands in the Terminal:
sudo rm /Library/PrivilegedHelperTools/com.davidwernhart.Helper
sudo rm /Library/LaunchDaemons/com.davidwernhart.Helper.plist
This should do the trick. If you want to be thorough, you can also Reset the SMC after uninstalling it.